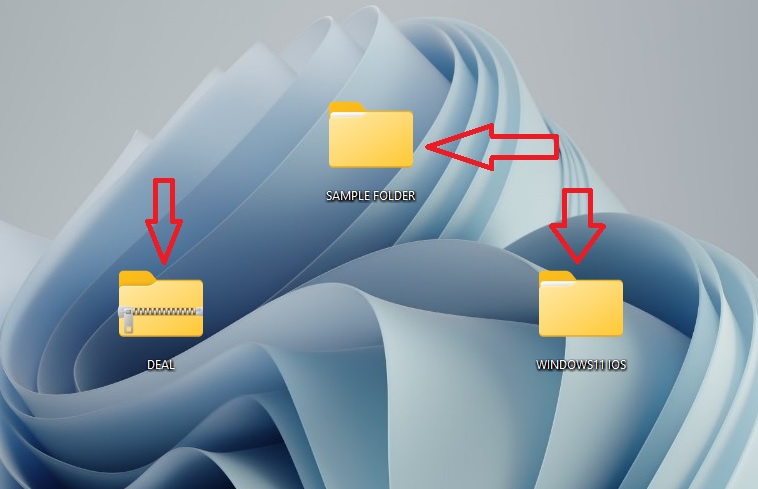
Today, I will be teaching on one of the basic things you are likely to be doing on that your Windows computer. It is about the folders in computer. I will also walk you through on how you can create as many folders as you want in the local storage of your Windows 11 computer. Know that this teaching applies also to any Windows computer you may be using.
What is Folders in Computer?
In the world of computer, a folder is a location created on it for organization of files. You can save applications, documents, images, and other file types in a folder. In addition, new folders called sub-folders can be created in an already existing folder.
The Basic Folders in Computer
If you are using any Windows version of computer, there are some basic folders created by default. The folders can be accessed by clicking on the File Explorer app at taskbar.
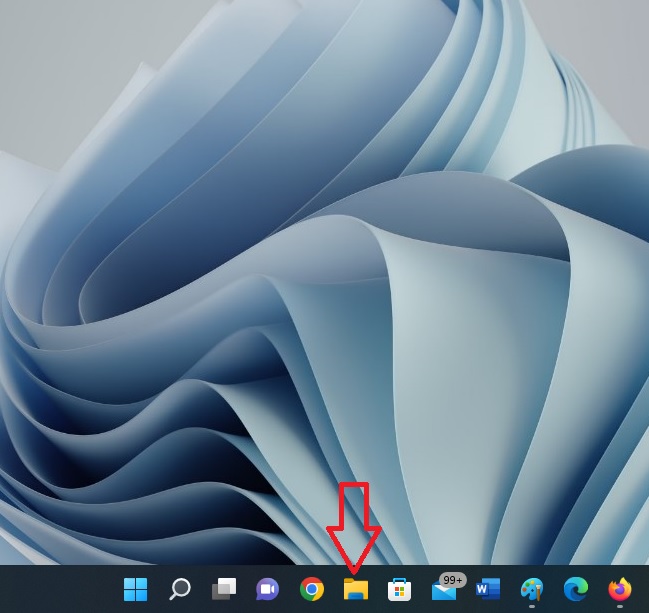
As you click on the File Explorer, it will be launched. The basic folders of the computer are listed at the section called the Quick access.
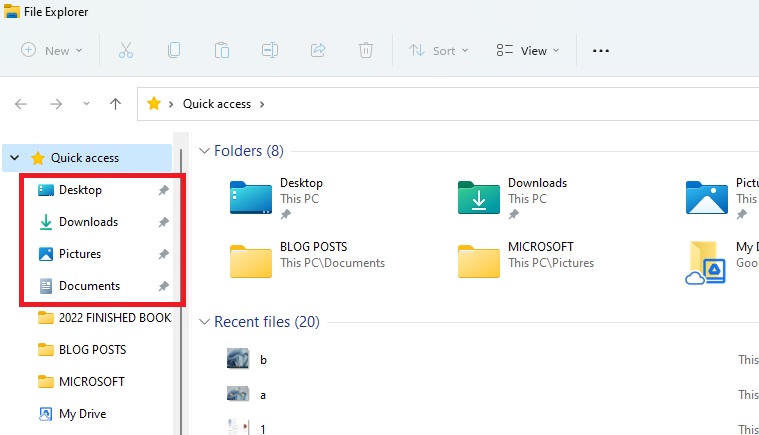
As indicated in the photo above, the basic folders of Windows 11 computer are Desktop, Downloads, Pictures, and Documents. The same applies to other versions of Windows computers.
Sometimes when you install applications on your computer, they appear on your PC Desktop. That is the reason you see some app icons appear there. Other folders can be created on Desktop. We will get there.
Downloads folder are created for saving mainly files you download from the internet. By default, any file you download through web browsers installed on your computer are saved in the Downloads folder.
Pictures folder is created by Microsoft for saving of images. You can save any photos you have in that folder. In the Pictures folder, you can create other folders.
Documents folder is created specifically for saving of documents. If you have any Word processing app, example Microsoft Word, the system expects you to save documents created with the app inside there. But, know you can create folders inside the Documents folder for proper organization of your files.
Steps to Create a Folder on the Desktop
Once you power on your computer, the part of the computer you see is called desktop. An example is the one displayed in the photo below.

That desktop is also a folder. Does it sound foreign to your eyes? It is what it is. You can create some other folders on that desktop and then add files inside them.
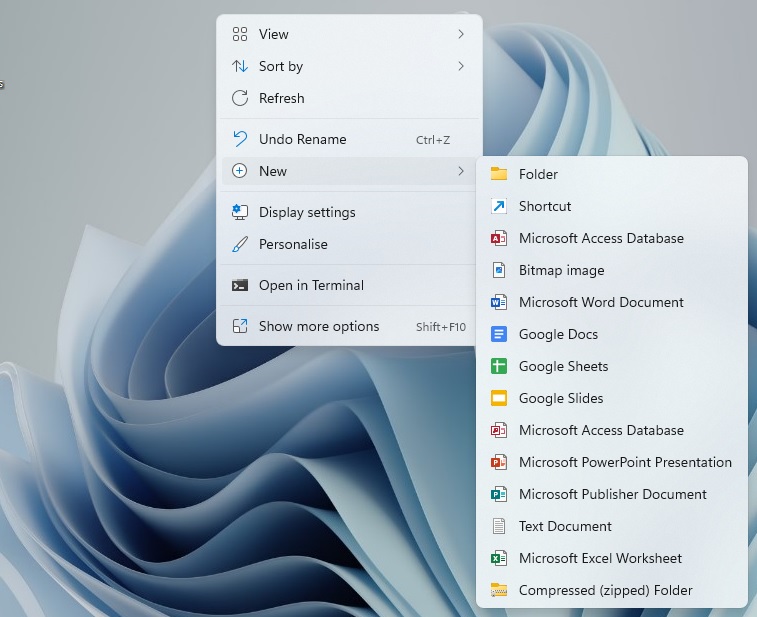
To create a folder on a desktop, right-click on any free space. When you do that, you will see some options.
Select New and then Folder. The photo below explains that.
Type the folder name. Examples are BOOKS, FINANCE, EDUCATION and many others. Just give it a name that is suitable to the file type you want to store in it.
After typing the name, press the Enter key of the computer to save.
Use the approach explained in this subheading to create other folders you may like to have on the desktop of your computer.
How to Drag Folders to Different Locations of a Desktop
After creating folders on the desktop of your computer, you may not like the way they scatter in different parts of your computer screen. You can organize them the way you like.
Take the cursor (the pointer) of your computer to the folder you want to organize. Press the left button of your mouse down. Drag the folder to the part of the desktop you want to have it.
When you get to the spot you want to keep it, release the pressure on the left button of the mouse. The folder will rest there.
How to Create Folders in Computer Via File Explorer
I have walked you through on how to create folders on the desktop of your Personal Computer. What if you want to create folders on the other major folders made available in your computer by default. How do you go about it? Let us discuss…
Click on the File Explorer app pinned at the taskbar. As the app opens, click on any of the major folders made available in the Quick access section. Let us use Documents for this example. So, click on the Documents folder.
As you do that, the Documents folder will open. Right-click click on an empty space in that folder. Select New button.
From the options displayed on making above selection, click on Folder. Type any name. And lastly, hit the Enter key of the computer. This action will save the name of the folder.
Use this approach to create as many sub-folders as you want to have in your computer major folders. Know that you can still create some other sub-folders inside an existing sub-folder. All you need is to follow the same steps given in this subheading.
How to Add Files to a Folder
You have learned so much on how you can create folders and sub-folders on your computer. Now, let’s discuss how to add files in those folders.
Method 1: Copy and Paste
You can use the approach of copy and paste to add files to the folder you created. Click on the File Explorer app and navigate to a file you want to copy. Right-click on that file, select the Copy icon.
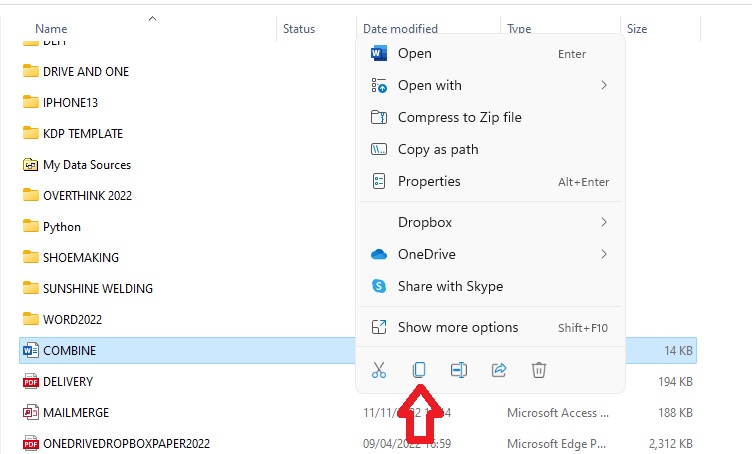
Then, navigate to the folder you want to add the copied file to. You will see the Paste icon at the top of the interface. Select it.
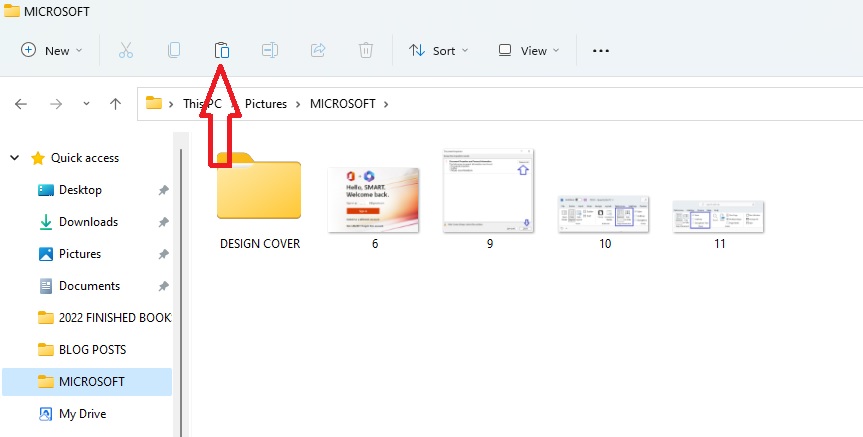
That is one of the ways you can add files in your created folder.
Method 2: Saving Files into the Folder
Another way you can add file to your created folders is by saving files directly into them. For example, if you are creating document file with Microsoft Word.
After adding content to the document, you can save the file directly into a folder. Remember, I am using Microsoft Word app in this sample.
Click on the File tab of the Word app followed by Save As button. Select the Browse option.
This will open the File Explorer Window of your computer. Click on the main folder. The sub-folder was created in it.
Double-click click on that sub-folder where you want to save the document file for it to open. And lastly, click on the Save button.
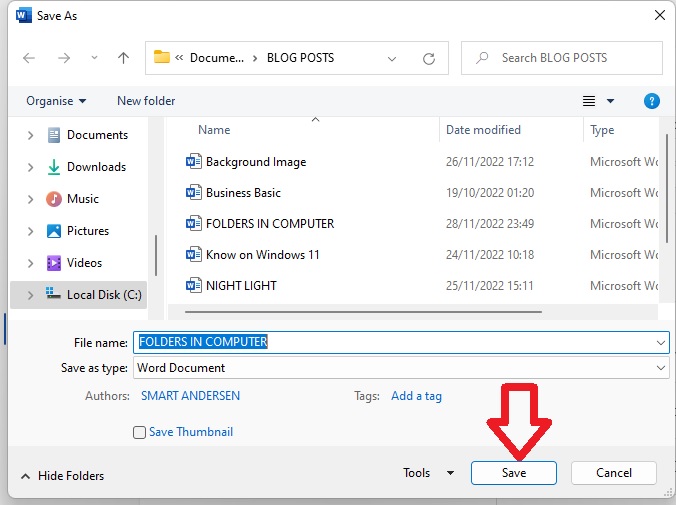
This is another method to save a file in a folder.
Know that there are other ways you can save files in a folder. An example is drag and drop.
You can check out this article on Techopedia for more information on folder.
Leave a Reply